
How to Use the Sitelas Editor
A guided tour of the Sitelas visual editor — edit vs. live, mobile preview, the theme panel, single and collection pages, the built-in AI assistant, and exactly how draft, preview, and publish fit together.
Sitelas Team

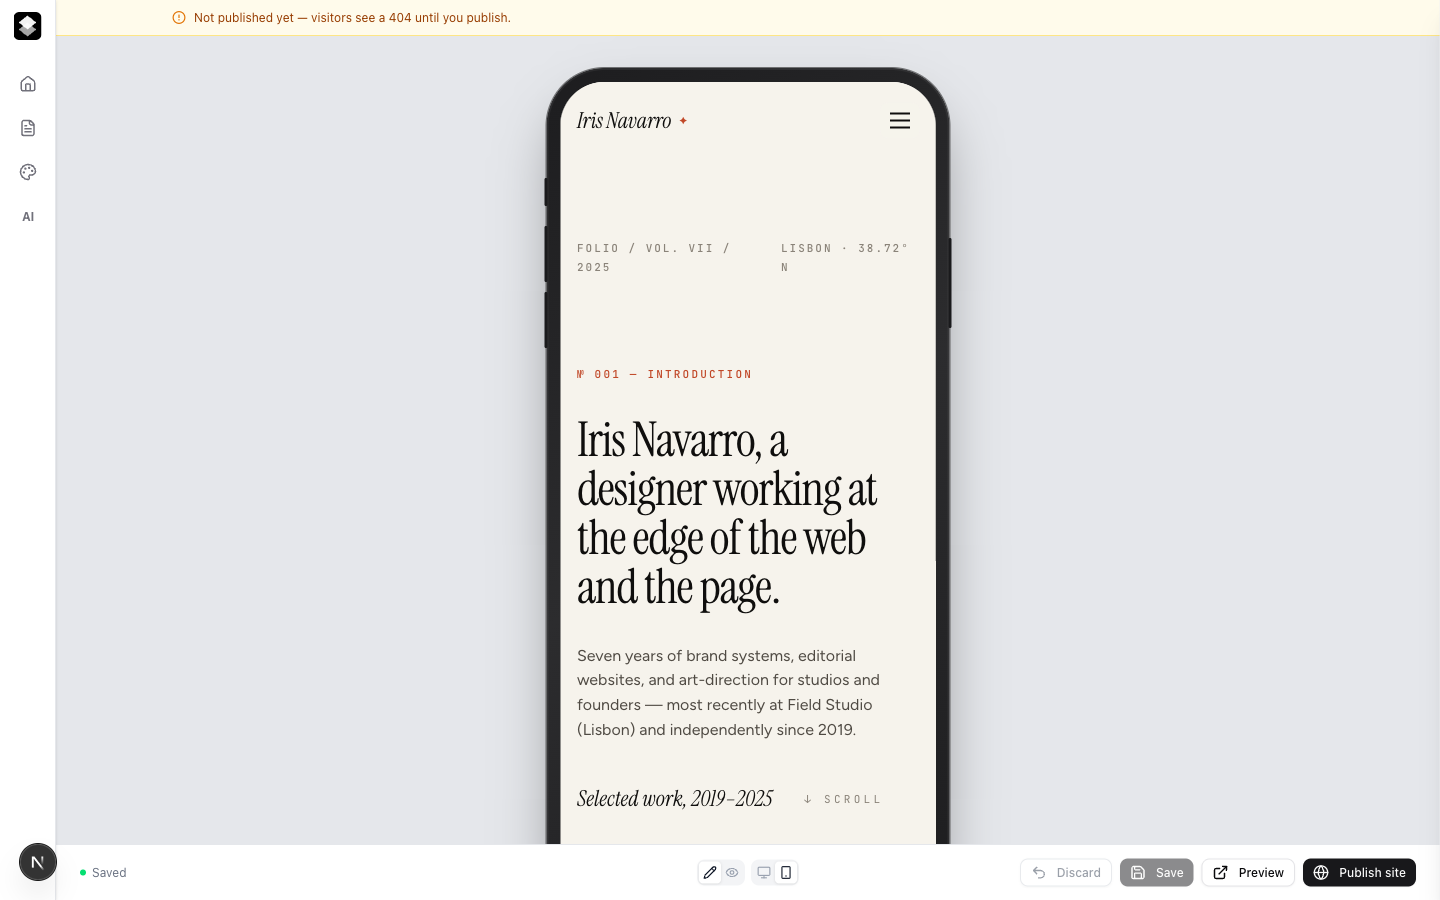
Every Sitelas site opens in a visual editor in your browser. It's where you nudge things by hand — change a headline, swap a color, add a page — and where you publish when you're ready. You reach it from your dashboard: open a site and hit Edit. By the end of this guide you'll have restyled a site, added a page, made an edit with the built-in AI, and published it — no code, no template wrestling.
That's the whole editor up top. Three regions to know:
- Left rail — Home, Pages, Theme, and the AI assistant.
- Canvas — your actual site, fully interactive. Click any element to select and edit it.
- Bottom bar — edit/live and device toggles on the left; Discard, Save, Preview, and Publish site on the right.
Notice the amber strip up top: "Not published yet — visitors see a 404 until you publish." That's the lifecycle talking — more on it at the end.
Edit vs. live, and previewing on mobile
The bottom-left toggles change how you see the canvas:
- Edit — the working mode. Click elements, edit text inline, drag focus around.
- Live preview — the same page without edit handles, exactly as visitors see it.
- Desktop / Mobile — flip the canvas between a full-width view and a phone frame to check responsiveness before you ship.
For a shareable preview, the Preview button in the bottom bar opens your site's preview URL in a new tab — a real, live link that always shows your latest draft (safe to send to a client; it's excluded from search engines).
Restyle everything from the Theme panel
Open Theme in the left rail to change the look of the whole site at once — no element-by-element editing.
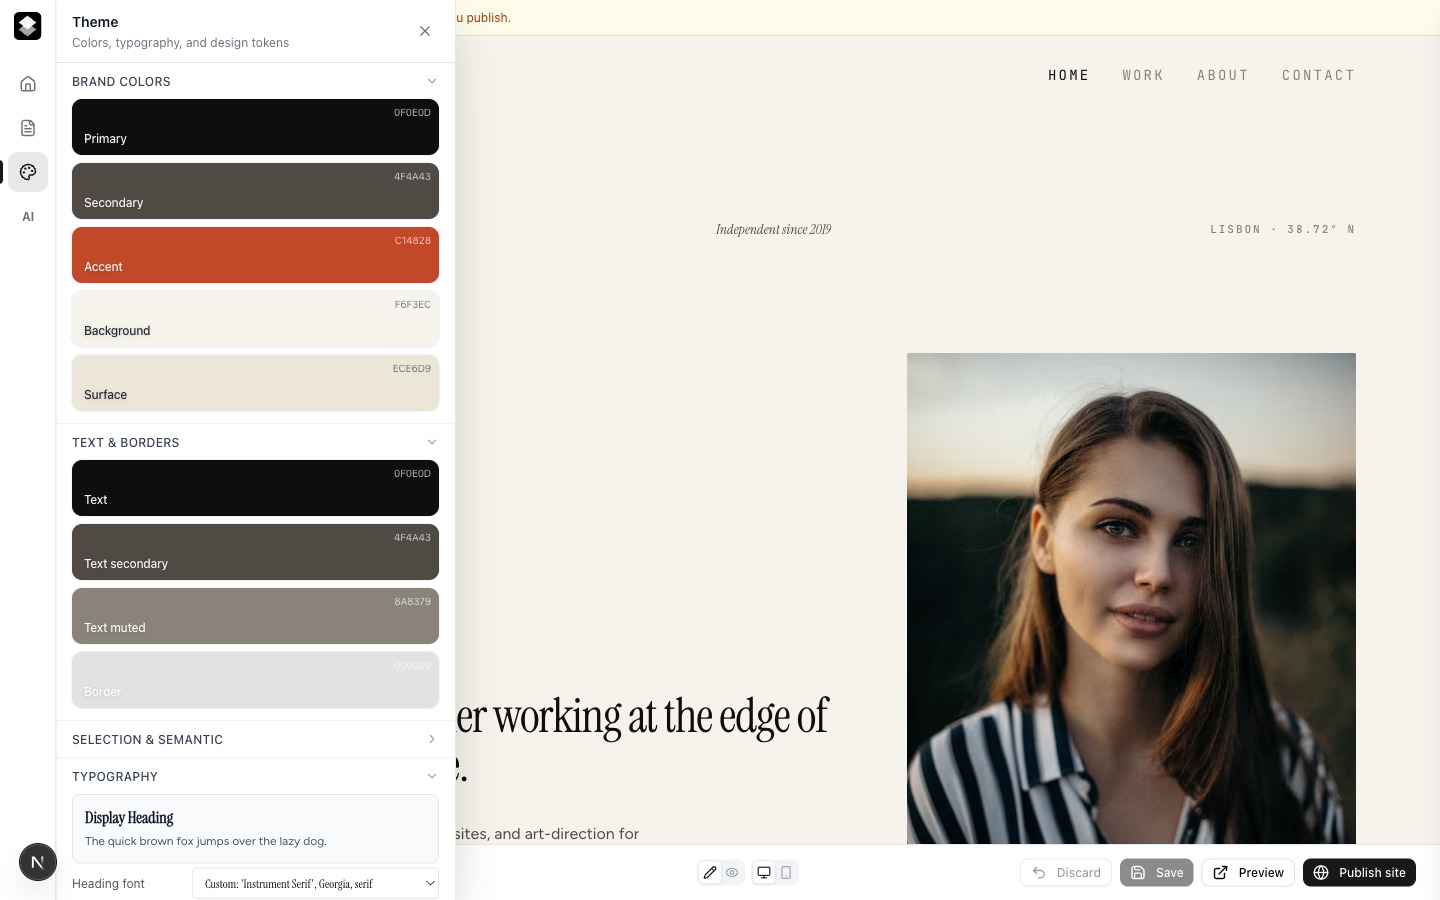
You get brand colors (primary, secondary, accent, background, surface), text & border tokens, and typography (display and body fonts). Change a token here and it cascades everywhere that token is used, so the whole site stays consistent.
Pages: single pages and collections
Open Pages to manage your site's structure. There are two kinds.
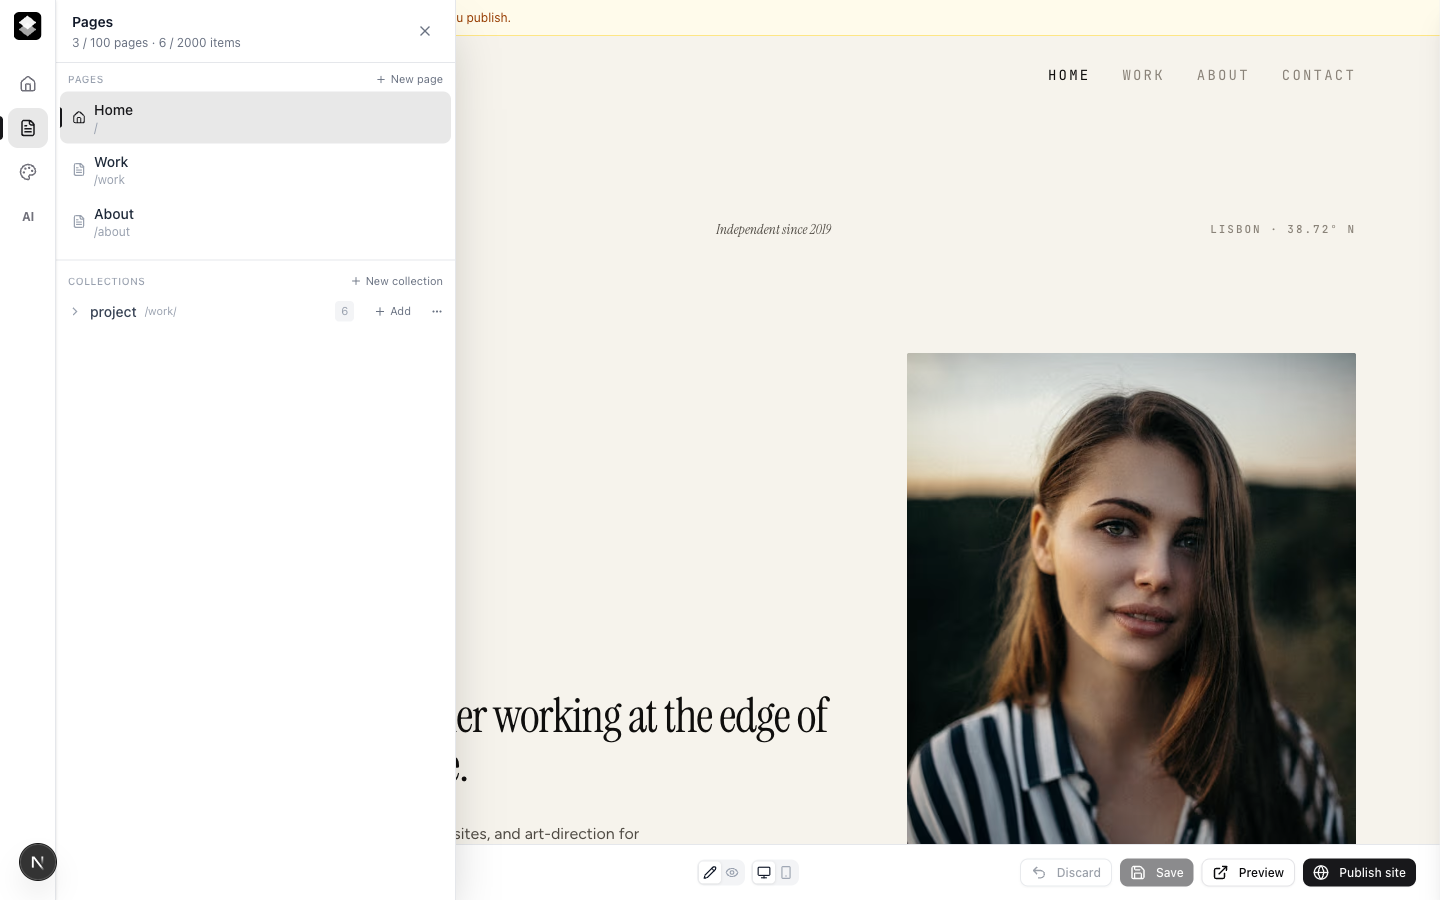
- Single pages — one page, one URL (Home, About, a landing page). Add, rename, duplicate, or delete them; New page creates one from scratch.
- Collections — one design, many entries. The
projectcollection here powers every/work/<project>detail page from a shared template, so adding a new project gives you a new page automatically — no rebuilding the layout. Collections are how you run a blog, a portfolio of case studies, a listing of events, and so on.
Click any page to edit it on the canvas; click a collection to manage its items.
Make changes by describing them — the AI panel
Don't want to hunt for the right control? Open the AI panel and just say what you want.
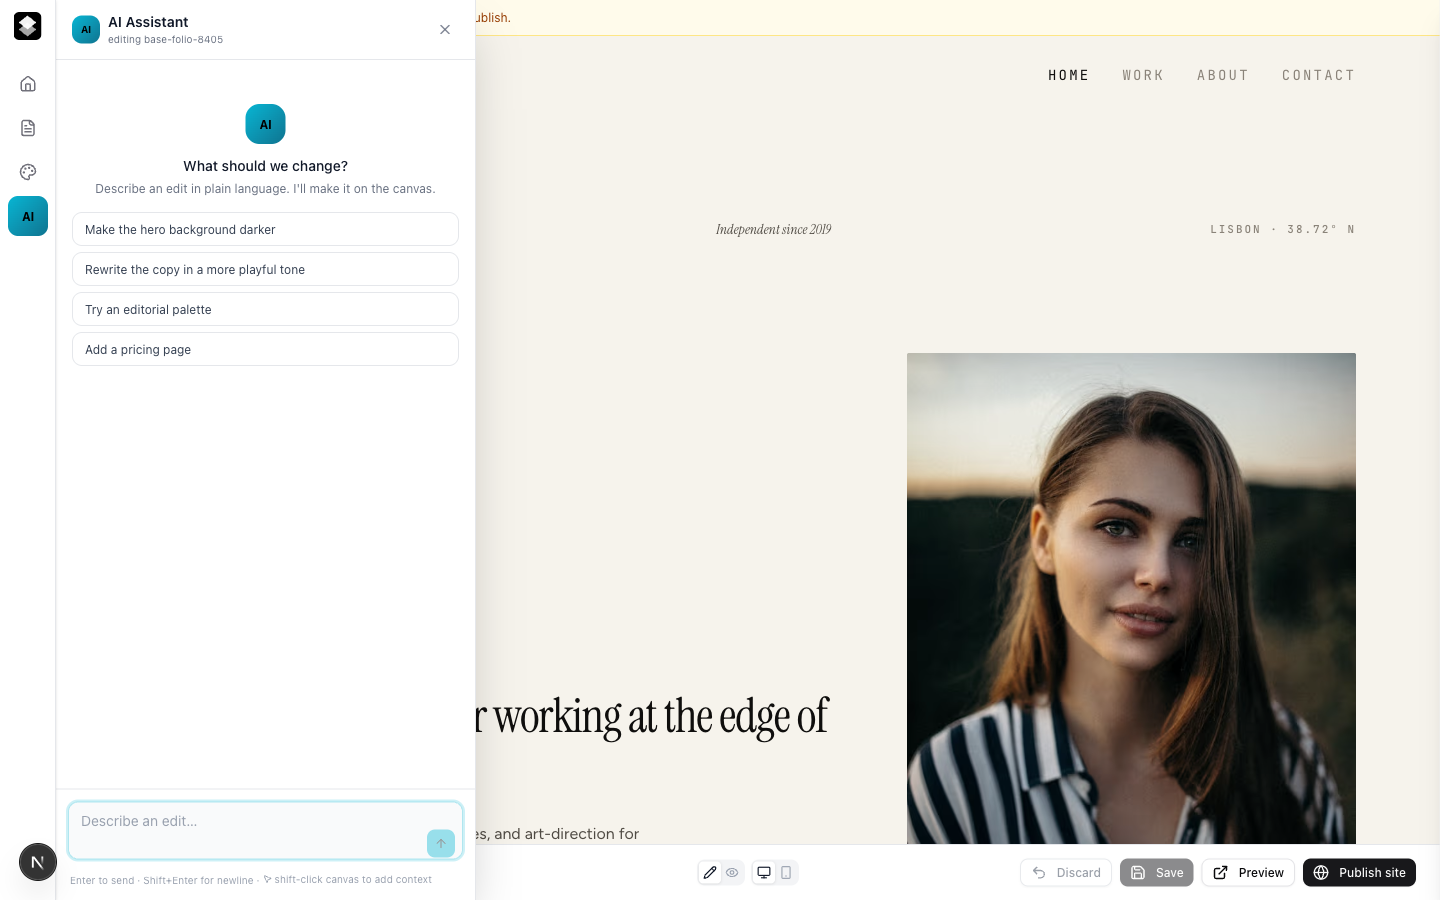
Type something like "make the hero background darker," "rewrite the intro in a warmer tone," or "add a pricing page," and the assistant makes the edit directly on the canvas. You can shift-click elements first to point it at exactly what you mean. It's the same draft you're editing by hand — so you can mix manual tweaks and AI edits freely.
How draft, preview, and publish fit together
This is the part worth understanding clearly, because it's what keeps your live site safe while you experiment.
- A new site starts as a draft. When you create a site — from a template or blank — it isn't public yet. Its live URL returns a 404 (that amber banner), while its preview URL shows the draft so you can review and share it.
- Every change lands in the draft. Edit text, swap the theme, add a page, run an AI edit — each Save updates your draft, and the preview reflects it immediately. Your live site doesn't change at all.
- Publish promotes the draft to live. Hit Publish site and the current draft becomes the public site. The banner clears.
- Keep editing — changes pile up in the draft again. After publishing, new edits go back into the draft (and the preview) and accumulate there. Visitors keep seeing the last published version until you publish again. Changed your mind? Discard drops the unsaved edits.
So the mental model is simple: the preview is always your latest draft; the live site is your last publish. You can iterate as much as you like without anyone seeing a half-finished change.
Forms and integrations
Your site can also collect leads — a contact or signup form whose submissions land in your Sitelas inbox and can auto-route to Google Sheets or a webhook the moment someone hits submit. Building a form and wiring it to Google Sheets is its own short guide: How to Build a Form and Connect It to Google Sheets.
Try it
Open your dashboard, create a site from a template (or start blank), and hit Edit. Restyle it from the Theme panel, add a page, ask the AI to change something, flip to mobile to check it — then Publish when it looks right. Prefer not to click around? You can do all of this from a Claude chat instead — see How to Build a Website From a Claude Chat. Sitelas is free while we're in early access — start at sitelas.com.
Sitelas Team
The Sitelas team writes about building and operating websites through chat — the Claude.ai connector, the in-editor AI chat, form integrations, and everything that ships in the box.


